


Choosing the right Bathroom Sliding Door is not only a style decision. It affects safety, cleaning, ventilation, and daily comfort. A clear glass panel may make a small bathroom feel larger. However, it also reveals water spots, fingerprints, and poor sealing. That detail is easy to underestimate.
Richard Trethewey, a longtime plumbing expert from This Old House, offers a practical reminder: “A beautiful bathroom still has to manage water well.” His point applies directly to sliding doors. The best design cannot compensate for weak rollers, incorrect measurements, or water escaping onto the floor. Experience matters here. A door that looks perfect in a showroom may feel heavy, noisy, or awkward at home.
This guide explores seven useful tips for choosing a Bathroom Sliding Door. It considers opening size, glass thickness, frame materials, track quality, water control, cleaning needs, and installation accuracy. Measure twice. Check the wall structure. Think about wet towels and limited space.
Small details matter.
You may prefer frameless glass for a modern appearance. A framed option might provide better stability and a more controlled budget. Neither choice is automatically best. Your bathroom layout decides more than current trends do. I also recognize an uncomfortable truth: even careful planning can miss something, especially around uneven walls or older plumbing. That is why product specifications, installer experience, and warranty terms deserve close attention. The goal is not simply a stylish door. It is a reliable entrance that opens smoothly, contains water, and remains practical after years of use.
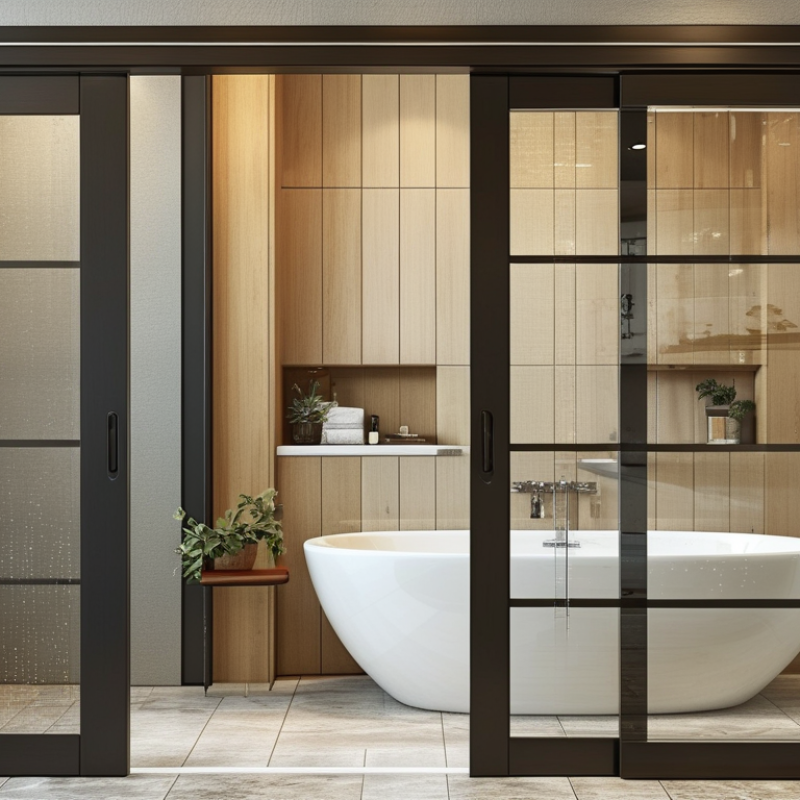
Choosing a bathroom sliding door begins with the room, not the hardware. Measure the finished wall, shower opening, ceiling height, and nearby fixtures. Leave enough clearance for towels, cabinets, and a person entering safely. A narrow room may benefit from a sliding panel. Yet the door still needs a stable wall section to park beside the opening. Mark its path with painter’s tape. This simple test often reveals awkward collisions.
Check whether the wall contains plumbing, electrical lines, or uneven framing before drilling. A qualified installer can inspect the structure and confirm suitable fixing points. Tile thickness also affects the final opening, especially when measurements were taken before installation. Record dimensions at the top, middle, and bottom. Measure again. Bathrooms rarely stay perfectly square. That matters. A difference of only a few millimeters can cause rubbing, leaks, or a poor seal. I have found that remeasuring after tiling prevents expensive adjustments later.
Consider how the door will move during daily use. Can someone open it while standing outside the wet area? Will a towel rail block the handle? Keep the wet zone contained, but do not sacrifice emergency access or ventilation. Choose a track length that matches the usable wall, not the room’s full width. Some layouts look spacious on paper and feel cramped in person. A cardboard mock-up can expose that mistake before purchase. Be honest about the compromise: a sliding door saves swing space, but it may reduce the clear opening.
Choosing the right material is the first practical decision for a bathroom sliding door. Stainless steel hardware resists rust well, especially in damp rooms with poor ventilation. Powder-coated aluminum is lighter and usually easier to maintain. However, cheap finishes may fade or peel near constant moisture. Check the frame edges, rollers, and fasteners carefully. These small parts often fail before the door panel.
Glass choice affects safety, privacy, cleaning, and visual space. Tempered safety glass is widely used because it breaks into smaller pieces if damaged. Clear glass makes a compact bathroom feel larger, while frosted or patterned glass hides water marks and personal details. Thick glass can feel more stable, but thickness must match the track system and installation instructions. Do not guess this measurement. A qualified installer should check the wall strength, floor level, opening size, and local safety requirements. Poor alignment can make rollers noisy and cause water to escape.
Try moving a sample door before buying. It should glide smoothly without scraping. Look for replaceable seals and accessible tracks. I once overlooked the lower guide, and cleaning became frustrating. That mistake changed my priorities. Beautiful glass means little when soap collects in unreachable corners. Also, remember that spotless glass is not always realistic. Daily ventilation and a quick wipe may matter more than a premium finish.
Choose the right sliding door material and glass by balancing safety, moisture resistance, maintenance, hardware load, and available space.
How to read the chart: 6 mm, 8 mm, and 10 mm are commonly specified nominal thicknesses for shower-door glass. Thicker glass can feel more substantial, but the correct option depends on the door size, roller system, frame design, and local building requirements.
Choosing the best bathroom sliding door starts with comparing the door style, hardware, and installation method. Frameless glass gives a larger visual field, while framed doors usually provide stronger edge protection and a lower initial cost. Semi-frameless designs sit between them. Houzz’s 2024 U.S. Bathroom Trends Study reported that 76% of renovating homeowners upgraded their shower area, showing how important this decision has become.
Measure the opening at the top, middle, and bottom. Walls are rarely perfectly square. A bypass door suits wider openings, while a single sliding panel works better in compact bathrooms. Choose tempered safety glass, then check its thickness and certification. Hardware matters, too. Stainless steel rollers resist moisture, but poorly sealed bearings may still become noisy. I once focused too much on appearance and underestimated cleaning access. That was a costly oversight.
Installation can be framed, surface-mounted, or recessed into the wall. Recessed systems look clean but require careful planning before tiling. Surface-mounted tracks are easier to repair later. The National Kitchen & Bath Association’s 2024 Design Trends research continues to identify aging-in-place and accessible bathroom features as major priorities. Leave enough entry clearance, avoid sharp projections, and confirm the floor can drain without splashing. The Harvard Joint Center for Housing Studies reported approximately $481 billion in U.S. homeowner improvement spending in 2023, so skilled installation deserves a realistic place in the budget. DIY may appear simple. It is not always forgiving.
7 Tips for Choosing the Best Bathroom Sliding Door
A sliding bathroom door should protect privacy, prevent injuries, and contain water. The World Health Organization reports about 684,000 fatal falls worldwide each year. Bathrooms deserve careful planning.
Tip 1: Choose safety glazing that meets CPSC 16 CFR Part 1201 requirements.
Tip 2: Select frosted or textured glass, and inspect privacy from nearby angles.
Tip 3: Prefer a low-profile track with smooth rollers and no sharp edges. A door that feels heavy may become difficult during an emergency.
Tip 4: Check the bottom seal, side seals, and door overlap. These details reduce spray escaping onto the floor.
Tip 5: Use corrosion-resistant hardware, especially in humid rooms. EPA moisture-control guidance recommends keeping indoor humidity between 30% and 50%.
Tip 6: Confirm the wall structure can support the door system. Tile alone is not a reliable anchor.
Tip 7: Measure the opening after waterproofing, not before. Small measurement errors can create visible gaps. I have seen attractive installations fail because the floor slopes slightly toward the doorway.
Do not judge water resistance from appearance alone. Ask for tested leakage performance, compatible seals, cleaning instructions, and replacement-part availability. A framed design may offer better containment, while a frameless door can simplify cleaning. That trade-off is easy to overlook. Door clearance also matters; leave enough space for safe entry and emergency access. Pay attention to the details you cannot photograph.
7 Tips for Choosing the Best Bathroom Sliding Door
Evaluate maintenance before appearance. 1. Choose corrosion-resistant hardware for humid bathrooms. 2. Inspect the bottom track. A shallow track traps less hair, soap, and standing water. 3. Prefer removable guides when cleaning access matters. 4. Check the rollers carefully. Sealed bearings usually reduce noise and replacement frequency. 5. Confirm the glass thickness and safety certification. Thicker glass can feel more stable, but it also increases weight and hardware demands. During site inspections, a smooth door often hides poor drainage beneath the track. That detail deserves attention.
Quality must be measured against total cost. The 2024 U.S. Houzz Bathroom Trends Study reports a median spend of about $35,000 for major bathroom renovations. A sliding door is only one line item, yet weak rollers can create repeated labor costs. 6. Request a written warranty covering hardware, seals, and installation. 7. Compare the installed price, not only the door price. Include delivery, wall reinforcement, removal, and future roller replacement. The National Association of Home Builders identifies bathroom upgrades as a frequent remodeling investment, reinforcing the need to assess durability over style alone. I would also question unusually low quotes. They may exclude waterproofing or adjustment work. A door that looks inexpensive can become costly when alignment fails.
| Tip | Evaluation Dimension | What to Check | Why It Matters | Maintenance Impact | Typical Cost Consideration | Priority |
|---|---|---|---|---|---|---|
| 1 | Measure the opening accurately | Record the finished width, height, wall condition, available side clearance, and plumb level of the opening. Confirm the door fits the shower layout without interfering with fixtures. | Accurate measurements reduce installation problems, water gaps, and the need for costly modifications. | Proper alignment helps the panels close evenly and reduces water buildup around seals. | Low before purchase; high if corrections are needed later | High |
| 2 | Select suitable glass thickness and safety features | Compare tempered safety glass options, commonly around 6–10 mm thick for framed or semi-frameless shower doors. Check for smooth, chipped-free edges and compliant safety glazing. | Thicker glass generally feels more rigid, while properly treated safety glass is designed to break into smaller granules rather than large sharp shards. | Rigid panels are less likely to shift, but all glass still needs regular cleaning to prevent mineral deposits. | Medium to high; thicker or specialty glass usually increases material and handling costs | High |
| 3 | Inspect the sliding hardware | Look for corrosion-resistant rollers, tracks, guides, fasteners, and handles. The door should move smoothly without excessive noise, wobble, or sticking. | Hardware quality strongly affects daily operation and is often more difficult to replace than visible seals. | Tracks and rollers may require periodic cleaning and inspection, especially in hard-water areas. | Medium; durable hardware may cost more initially but can reduce replacement frequency | High |
| 4 | Choose a low-maintenance surface | Compare clear, patterned, or treated glass. Ask whether the surface treatment is factory-applied, how long it is expected to last, and which cleaners are permitted. | Glass treatment can make water spots and soap residue easier to remove, but it does not eliminate cleaning. | Wipe the glass after use when possible; avoid abrasive pads and harsh chemicals that may damage coatings or seals. | Medium; treated glass may add an upfront charge and may need renewal over time | Medium |
| 5 | Evaluate water containment | Check the overlap between sliding panels, bottom guides, side seals, threshold details, and the door’s compatibility with the shower curb or enclosure. | Sliding doors are not completely watertight; good overlap and correctly installed seals help limit splash and leakage. | Seals should be kept clean and inspected for brittleness, mold, gaps, or shrinkage. Replace worn seals promptly. | Low to medium for routine seal replacement; high if poor containment damages surrounding finishes | High |
| 6 | Compare installation requirements | Determine whether the wall can support the door, whether waterproofing is complete, and whether professional installation is recommended for drilling, leveling, and sealing. | A correctly installed door operates more reliably and lowers the risk of leaks, cracked tile, or uneven movement. | Good installation minimizes stress on rollers, frames, seals, and wall connections. | Medium to high; labor, wall reinforcement, tile work, and disposal may be separate costs | High |
| 7 | Calculate the total cost of ownership | Include the door, hardware, delivery, installation, waterproofing adjustments, cleaning products, replacement seals, and possible roller or track repairs. | The lowest purchase price may not be the lowest long-term cost if parts wear quickly or maintenance is difficult. | Prioritize replaceable seals and rollers, accessible tracks, clear care instructions, and readily available spare parts. | Varies; compare purchase price plus installation and expected maintenance over the service life | High |
General guidance: Actual prices, service life, maintenance frequency, and installation requirements vary according to door size, glass thickness, hardware configuration, local labor rates, water hardness, and bathroom conditions.
Get the latest news straight from us on all our new products, features, services, and much more!
